Showing posts with label tutorials. Show all posts

Friday, 24 April 2015

My Heart Goes 'BOOM!' - A Scrappy Journal Page

It's FRIDAY!!! WOO!

I like a Friday...it leads to weekendy time and I do like a weekend. Are you well? Have you had a good week? I hope so - I hope it's been FABULOUS!

Sooooo, it had been my plan to scan in some of my mum's pics for you to enjoy, but I'm having a few tech issues so I think that might have to wait 'til next week. Hey-ho. Instead, I have a little journal page process again, using some hand-painted backing papers.

I love making my own patterned sheets. Most of them are the result of cleaning brushes and stencils or using up excess paint from a project. The addition of a bit of doodling over a page filled with colour turns a sheet of scrappy mess into something fun and very useable. 


For this page I chose the scrappiest of the stack I had - ta-daaah!


Scrappy. I want to prove that you can make something arty from something scruffy you might be tempted to otherwise throw away.  I also used the cheapest paints I had, some craft acrylics and some paint testers from the local hardware store.


I prepared a page in my journal, gessoed the surface (just a thin layer) and then added a warmer colour of acrylic paint as a more even base coat. I cut some rough heart shapes out of the backing paper, choosing sections which would look arty and interesting. Once the hearts were cut out, I was left with a lot of scraps which I tore up (torn edges collage better that cut ones) and stuck down to make a colourful background -


I blended the elements into the background by finger-painting some bright colours around them. To make the hearts 'pop' I used a black Inktense pencil and a litte water to add an outline, then used matte medium gel to adhere them to the page in a way that kind of makes them look like they're exploding out from a centre point -


I also added some of the offcut strips to make it look a bit more animated, then some more pencil around the elements to define them and make them stand out. I used a black gelato crayon to add a border to the page - it smudges beautifully!


I wanted to add a quote...something....but nothing comes to mind at the moment. The good thing about art journal pages is that there's no pressure, and as I like the way the page turned out I've left it for now..I can add text any time I like.


 This is only a small journal and it's not full BUT it's amazing how easy it is to fill one like this with your art. I know that art journaling can seem daunting, but it's really cool when you can flip through a book that YOU have filled with YOUR art, I promise. I use this journal when I want to do a 'process page' so you may have seen some of the pages in earlier posts but I'll collect them all in one place for an easy browse! Here they be:


There are a couple of pages not included above as I can't scan them tonight and have filed the originals....SOMEwhere.....told you I'm having tech issues! I just wanted to prove that it doesn't take much to make a few pages look like a book that will be something REALLY special for you and the people with whom you share it.

I hope you have some fun making your own papers and collage elements - it's so easy and a LOT of fun! And I hope this has been helpful. Thank you for visiting - thank you to everyone who leaves a comment! It's such a motivation and I send you all loads of love and big hugs from Shroo :) xxx

Monday, 19 January 2015

Why I Journal: Part 2- Your First Steps

Hello arty people of awesomeness!!

 It's MONDAY again!


How the heck are ye? I hope you're all well and not filled with winter grot or snowed in or something equally vile. Thank you squillions for your patience with my wonky brain and its "special" moments!


It's been a week of ups and downs but I'm back on an even keel, and actually, I think the last few days have been useful with regard to my journaling posts and arty stuff in general. Weird but true..... and I'll yatter on about may arty exploits more in my next post.

I think I'm going to continue the 'Why I Journal' posts for a little while as there's a LOT that I'd like to cover and I'd like to add some exercises in there which some of you might find useful. So, with that in mind, and without further ado, here we go -

Why I Journal: The Second Bit 

* Choosing your journal
* Have A Go At This (journaling exercise)


Choosing Your Journal: The First Step

This is something that seems to stress a lot of people to the point of giving up before they even begin, either ending up journal-less because they just can't choose, or otherwise living with a stack of blank books which present a daunting prospect and never see the light of day or the hint of a pen nib. We are all - ALL - so guilty of stuff envy. You know - wanting every possible arty option, every brand, every size, every colour, and at least six of each so we never run out. Yep. Been there. Done that. Just remember this one thing:

* Choose what makes YOU happy - this is YOUR time, YOUR hobby.

I'll write more about journal choices in the next post, but for now, if you're just stepping out...

  1. * Be practical. If you're going to carry a journal around with you, maybe best to choose something that fits easily into your bag and not a gargantuan tome that requires a forklift truck to lug about.
  2. * It's inevitable that you'll buy more stuff - but for now, look around your house and find something that will do for today....there's nothing to stop you picking up a notebook and journaling your search for your perfect journal! (for example, list brands, collect coupons for local stationery or art shops, useful websites). Get used to writing something - anything! It's good practise. The important thing is that you BEGIN.
  3. * Don't judge yourself by other people's choices. They chose their book....you'll choose yours....and?
  4. * Try not to be intimidated by styles and techniques that you like but haven't tried yet. They key word is YET. There's no need to say "well, I'd LOVE to keep a journal, but I want to use art and I don't know how to paint. I can't paint therefore I can't journal. That's that." Nonsense. What CAN you do? Well, then do THAT for now while you enjoy learning new things. Journaling's about progression and allowing yourself to follow the path of your life changes and growing abilities. The only person judging you is you. Stop it, you dafty - you're FABULOUS!

* Have A Go At This *

Here are a couple of fun and easy exercises for you to have a go at - one's writey, one's arty. Pick one, or both and see where it takes you.

Writey exercise - 'A Letter To......'

It's often hard to write your feelings down if you're not used to it, and recording events can seem a little pointless so....

Imagine that you're writing a letter to a good friend or relative. It can be a long missive, or a short note. If you couldn't text or phone them, what would you write to them? Would you tell them a good joke? Write a recipe? Tell them you renewed an aquaintance or had a row or got a new job? Maybe you'd tell them about an awesome new purchase, or a film you've seen that you'd recommend and you'll tell them why.

Instead of writing in a book, pick up a nice piece of paper and actually write a letter. It can honestly be to anyone - they can be living or otherwise engaged in floaty amazingness in the afterlife. Write to fictional character! Harry Potter? Aslan? Gandalf? Sherlock Holmes? Write to your baby, who may not be able to read yet, or even speak, but may one day have the joy of reading the silly, funny, personal things that can be precious in later years. Write to your deity of choice. Write to the fairies, pixies or elves. Write to yourself in the future....or the past. It matters not who choose to write to - just write....anything, everything. You can even fold your letter and put it in an envelope (don't forget to include the date!) You can always add your letter into a book, or otherwise KEEP letter writing your days and your thoughts and tie them in bundles with pretty ribbons and keep them in a beautiful box surrounded by keepsakes and the ephemera of your life. What a GORGEOUS and personal keepsake for you and your loved ones!

Arty Exercise - 'My First Book'

This is a great idea for anyone who's never before used art in a journal exercise, BUT if you're used to adding art elements to your journaling process then you can upscale the concept to something more flashy that suits your level and skill set. For this blog post I'm going to assume that you, darling reader, are a lovely beginner.
*

To begin, choose between five and ten key words which represent and sum up the things you want to bring into your life in the coming year. They should be positive and happy words designed to encourage and support you. It's entirely up to you whether you relate them to artistic and creative endeavours, or whether you want to relate them to other aspects of your life. For the purposes of this exercise I've chosen the following: GROW, BECOME, FUN, CONFIDENCE, SHARE, LEARN, CREATE.

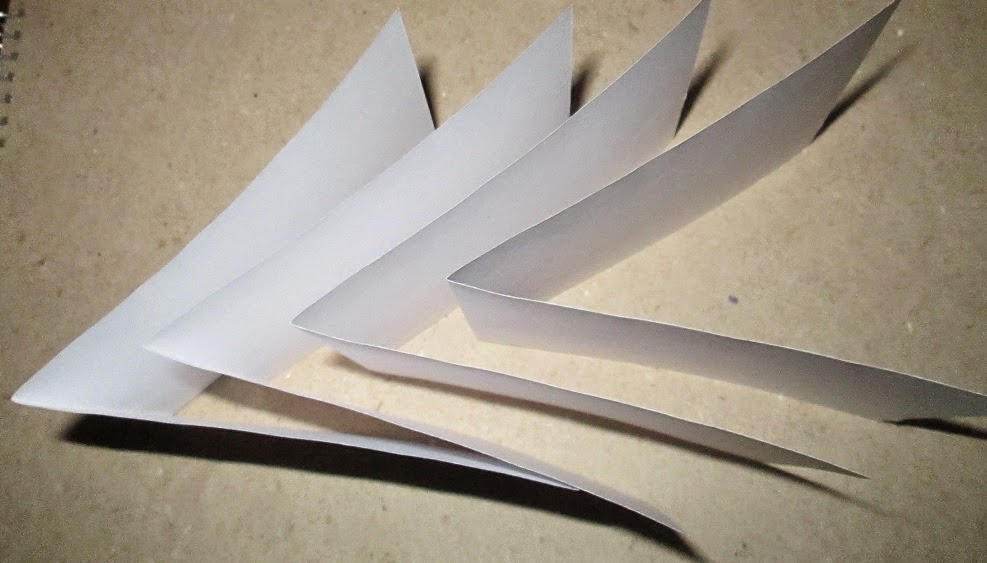
You're now going to make a little book - possibly your first, but I assure you that it's easier than making a sandwich so you'll be fine. Go grab a few sheets of paper and a pair of scissors. The number of pages you'll need depends on how many words you've chosen so to make it easier I'll just assume (again) that we've all chosen seven words. Just because.

Cut four pieces of paper (you'll need more if you've chosen more words) and then fold them in half so that they all fit inside each other to make the pages of a book, like this  -


Select a length of twine, cord or thin ribbon that's roughly three times the length of your page spine, place it inside the centre page against the spine, turn the book over and gently but firmly tie the fastening on the outside of the spine. Like this -


The ribbon in the picture's a little too wide, but I wanted it to show up - yours should be a lot narrower so that the pages all turn easily. Remember not to pull the fastening TOO tight or it'll tear the paper, ok?  So voila! your first easy peasy little book!

You can decorate your cover however you like. I've made a quick example and just glued down a pretty picture cut from a magazine -


This is an exercise to help you practise using an image to represent or highlight a word or concept. 
This doesn't have to be difficult. Look at the words you've chosen. You're going to journal them into your book with complemantary images using basic collage techniques. You can find more pictures from magazines OR you can make your own simple shapes instead. For example, if you want to represent "LOVE", you could cut out a picture of a happy couple, a mother and child....a cake! OR you can paint and cut out a lovely heart shape and flex your arty muscles even more! It's up to you whether you use just one technique, or opt to mix the two. Now write your words out clearly onto paper and cut each one out so that you have a little pile of seven words and another one of seven images.

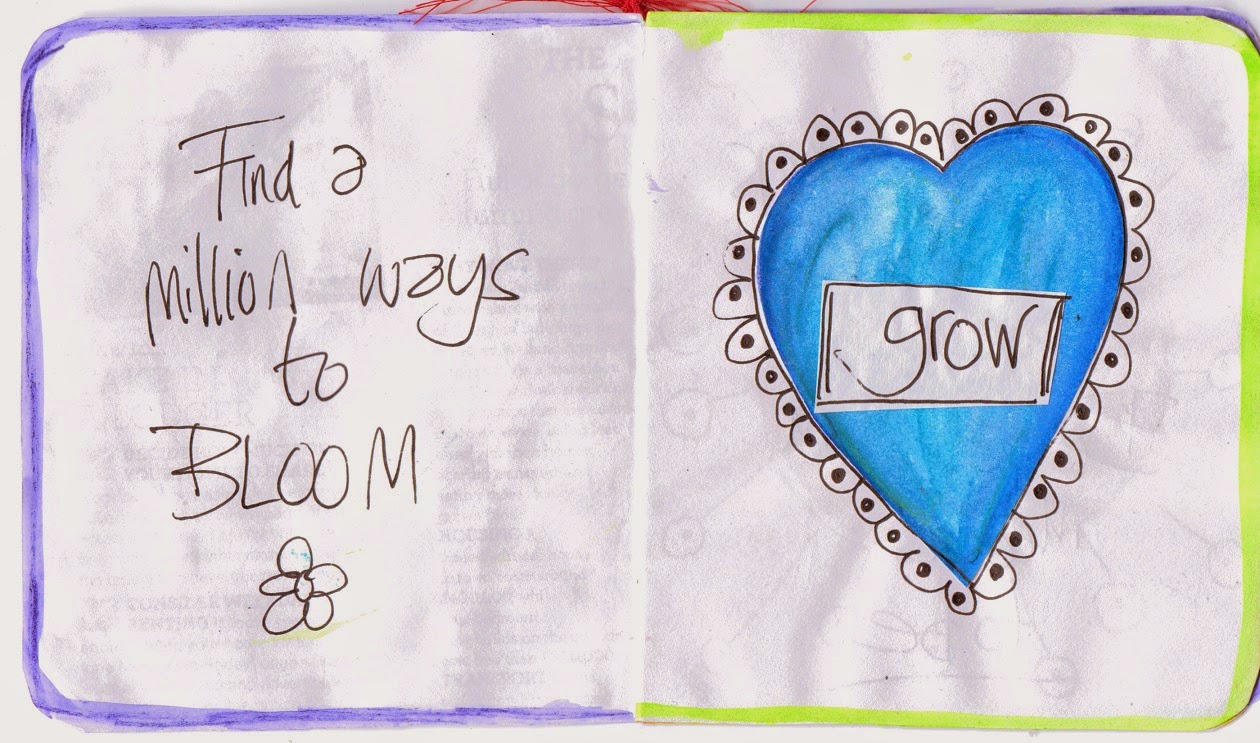
Open up your book and glue your matching images and words onto the right hand pages of your book. Find a way to overlap the two that pleases you. See how easy collage can be?  You can add some doodles or borders - whatever makes you happy. On the blank pages opposite your image, write a sentence that sums up a relevant GOAL that you want to achieve. Here are the pages I finished so that you can see what I mean -


This little example book is really simple and basic so you can't use the excuse "Oh, that's out of my comfort zone". Honestly. Of course, if you want to make yours AWESOME, please feel free!

The aim of the exercise is that you COMPLETE a project with confidence.  SO many of us put off starting a new hobby because it seems daunting, but this won't take you long at all, uses only the things you already have around you, and should be a bit of fun! You can involve a friend, or do a similar project with your kids, as long as at the end of it you have a little completed book to remind you that you CAN take that first step.
*
So now you have a couple of ideas to get you started on your journaling journey. I hope they're helpful. I'll update you on my own art progress in the next post and give you some more journaling exercises as well.

If you're a fellow blogger please consider taking a bijou peek-ette at the fabulous "GROW YOUR BLOG PARTY" hosted by Vicky at "2 Bags Full".  It takes place on 25th January and encourages participants to visit hundreds of arty crafty blogs, follow the ones you like, and encourage more lovely, gorgeous followers of your own.

http://vicki-2bagsfull.blogspot.co.uk/2014/11/grow-your-blog-2015-party-this-is.html

For now, here're some doodles from my diary - thank you for visiting, for your patience and your support! HUGE SPARKLY HUGS from Shroo :) xxx


Wednesday, 12 March 2014

An Insomniac's Altered Book/Adapted Book-Plate Budget Tutorial

Helloooo!

I can't sleep. Nope - not a wink. Wiiiiiiiiide awake... SO  - I thought I'd faff about with muh art s'plies and do another tutorial for you. This is another versatile project and one that doesn't need a mahoosive amount of expensive product. I'll talk you through the steps and show you what I used for each one, but you can substitute any number of things from your own stash at any point. You shouldn't need to buy ANYTHING new in order to do this. I've chosen a really simple concept and design, but again you can let your imagination go nuts! So put away your stress on a top shelf somewhere and settle in for some fun!

Budget Altered Book/Adapted-Bookplate Tutorial

For this project I used:


  • an old hardcover book
  • Faber Castell Gelatos
  • crafter's acrylic paints
  • Faber Castell Pitt pens
  • Derwent Inktense pencils
  • Uni Ball Impact gel pens
  • Chestnut satin acrylic lacquer
  • matte gel medium
  • Treasure Gold gilding wax (Classic)
  • scrap paper
  • water
  • kitchen roll
  • ink pad & sponge
  • page folder/scraper

OK? Let's start this thang!  Pick your book. It could be one you've made or altered, a sketchbook or journal, or just one that's crying out for decoration... I selected this old encyclopedia, which is falling apart already.


I chose a page from this book for my base paper, 'cos at some point I'll most likely gut it and use the cover for a new journal - also I like book text as a background, but you can choose anything you like, including junk mail, scrapbook papers or even newspaper.


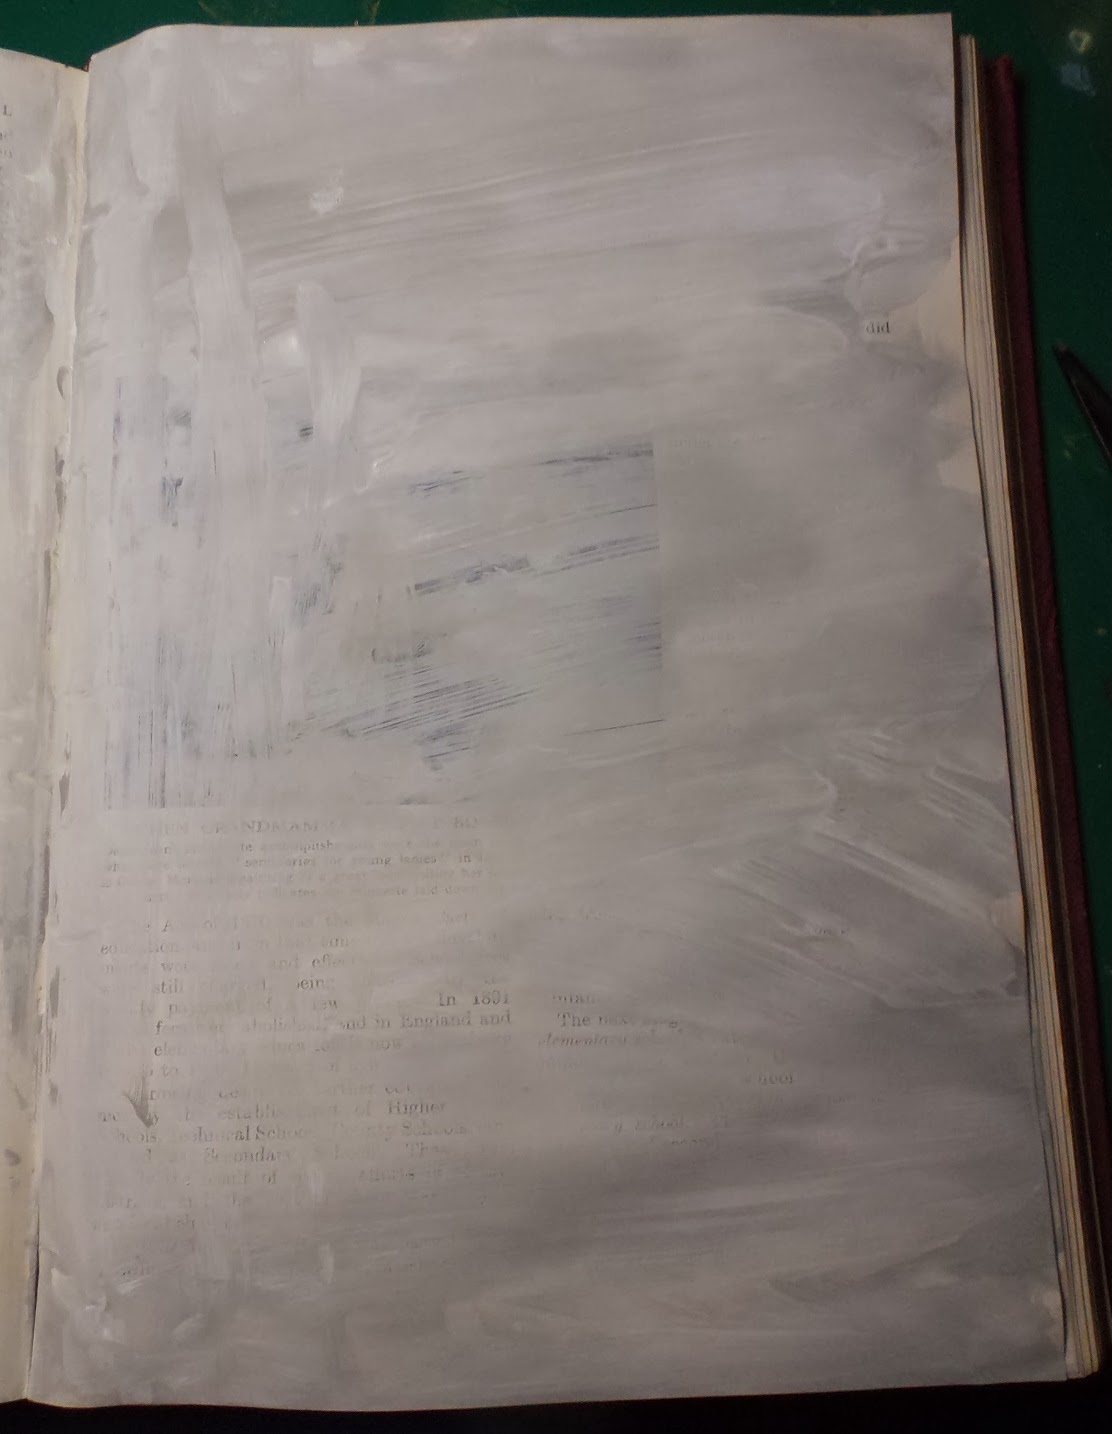
I picked some complementary base colours. You can use Gesso if you like, but I wanted a few mixed tones - not just plain white (you'll see why later on in the project). I like to splodge the paint on with my fingers. I don't mind getting messy and it means that I can really control how much they blend. when I'd finished smooshing, I decided to splash on a little water and take off some more of the paint to allow the book print to show through:


I decided to make a simple landscape for this book plate as it's very much suited to this collage technique. It's pretty simple but you have to trust that it'll all come together in the end, ok? I created a sky effect by adding some drops of turquoise (YUM!) acrylic, then used my page folder as a scraper to move the paint around the way I wanted. (I KNOW some of you will have to do some deep breathing at the idea of such abuse... but hey, the page folder's washable, and I'm too lazy at this time of the morning to go get a scraper)


I found a piece of kraft paper I'd saved from a parcel. I crumpled it up - for extra texture - flattened it out again and tore it into three pieces, which would become hills in my landscape. You could use any paper you like - I just like the kraft :


I used Studio matte medium to adhere the pieces to the page, overlapping them to create a layered effect. I like this medium because it creates a good workable surface, but you could just as easily use Mod Podge, PVA glue or glue sticks - your choice. I left part of the bottom and middle pieces like little flaps so I could tuck things behind them...


 I chose three contrasting paint colours - one for each segment (hill) and finger painted them onto the paper, dabbing some paint off again with kitchen roll so that there was more conrast - not just flat colour.


I took some scrap paper pieces and tore out some abstract shapes that I could use for trees in my landscape, and glued them in under the flaps I'd left, gluing those flaps down afterwards. The crinkles in the paper help to disguise the lumps.


Like I said - trust me.

I grabbed some nice Gelato colours and coloured in some definition colours, wetting them to help smear the colour where I wanted it. You could just as easily use ANY water soluble media. I wanted quite a lot of layers, but you can choose to add as much or as little as you like.


Just for the fun of it, I used a couple of Inktense pencils - one dark, one contrasting - and a couple of Pitt pens, selected the same way, to add more definition around the shapes. Again, these will smoosh about beautifully with a little water. I used my fingers again....weeeeeeell, they were already covered in paint anyways!

The  crinkles in the kraft paper hold the squidgy media in interesting ways, and the edges of the torn paper soak up the colours beautifully. I added some light Gelato colours here and there to pick some shapes and stop things all blending into one big block.


I added some more 'cloud' layers to the sky with the same drip and scrape technique that I used for the 'blue'. THIS is why I used a blend of tones on the base coat - I wanted the white paint to stand out. I also added some gold gilding wax using the pad of my index finger so that it would pick out the raised, bumpy elements in the collage. The wax catches the light and adds more tone and brightness.

 At this point I gave the page a light coat of the Chestnut laquer. It's just a personal preference as it holds the soluble media fast, and allows me to wipe away any excess in new layers without disturbing what's already there. Plus it helps to seal the layers. Mod Podge will do the same thing, as will clear Gesso, but be wary as both products may soak up or smear unfixed colours. Some spray fixitives will also affect the water-soluble media. I DO like the Chestnut lacquer...oh yes I do!

Once the lacquer dried ( about 5 minutes) I used gel pens to add some definition and detail -


Once I was happy  with the result, I added another layer of lacquer and cut out the part of the page that I liked the best in order to make a panel. I inked the edges with black Staz-on ink and selected some rub-ons that I could use to finish the piece. You could just as easily use stickers, die-cuts or doodles - your choice.


Now select your glue or tape of choice and afix in place! This is how the finished panel looked on my book cover - 


Came out ok in the end! I find that a LOT of projects look pretty questionable 'til I get right to the end...just gotta stick with it.

This is so simple to do and easy to adapt to materials and personal tastes. The whole thing took about 45 minutes (with photo taking)...this blog post has taken FOREVER by comparison!! HA! I PROMISE that you can find substitues in your current stash for pretty much anything I used. Why not try pastels or charcoal to add definition? Watercolour paints or pencils? Soluble crayons? Oil pastels? There's loads of room to experiment and have fun.

So now it's, like, 7:30 am and I'm finally sleepy. I hope you find this tutorial useful (and not too rambly!)  I'll now catch an hour or two before it's back to the business of the day! Hope YOU'VE all had some sleep! Sending hugs from sleepy Shroo :) xxx